My group and I recorded our reflections on the how we felt the test shoot went in the form of a podcast. This be be accessed below:
My Outside Digipak Panels
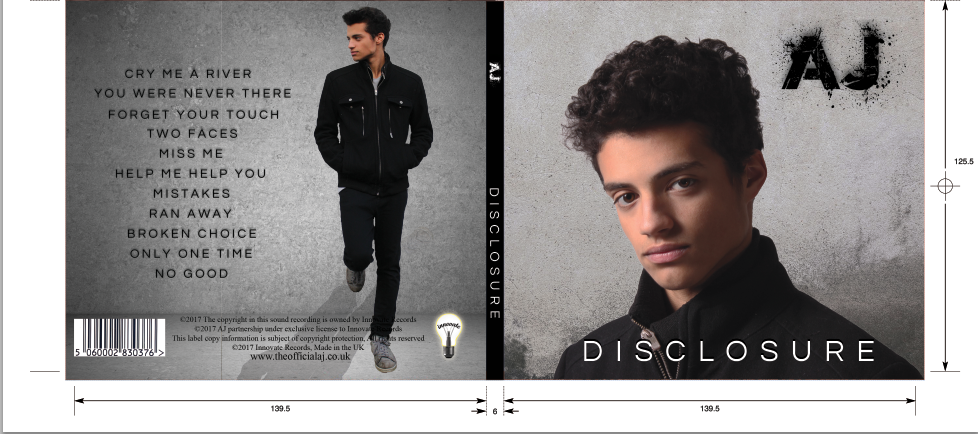
My Inside Digipak Panels

Please click the image below to view our finished website

Wednesday 1 February 2017
R+P Post 19: Our rough cut
For our rough cut we had to edit all week but each member of the group was given specific time allocations in which they had to edit alone as we did not always have the same periods in which we were free in order to edit as a group.
 |
| Our rough cut editing schedule |
After everyone had finished editing we came together as a group to watch through our rough cut video to get rid of any more underlying issues which we could sort out, such as unbalanced audio, and then to make notes of any issues which could only be sorted out on another shoot day, such as continuity errors.
Once we had found every issue we wanted to correct, we made a list of revisions which we would take on board when adapting the storyboard, shoot boards and timeline; thus allowing our main shoot day to consist of everything we needed top ensure we fulfilled all of our revisions. Moreover, we also showed our final rough cut video to our teachers who gave us feedback, from which we took some ideas on board to help make our sequence better; we also had the technician watch though it to ensure any technical issues could be resolved or at least found so we could work on them.
 |
| Our group's revisions |
 |
| Our teachers feedback |
R+P Post 18: Our test shoot
The purpose of the test shoot was to to find any issues in our planning or our overall idea which we could then resolve before our main shoot as after this it would be much harder to film any more shots within time restrictions. Some of the planning tools we used which had to be adapted included, the shoot board and the storyboard.
After editing our test shoot footage we encountered some issues such as a lack of purpose for the antagonist, Damien Brooks, as it was not obvious to a viewer if he was actually watching the news broadcast due to the shots we used on the shoot board. For example, we changed shot 8 on the storyboard to a close-up (as seen on the sample page to the left) as this would make the transition from the camera filming the laptop screen to a full screen of the news anchor more seamless and in turn make the audience know that this is what the antagonist is doing.
For our storyboard we had to add extra shots, such as reactions shots of the antagonist watching the news broadcast as this would make his purpose in the sequence more obvious to the audience and in turn make the resulting phone call make more sense. Some of these reaction shots included a shot of the antagonist becoming relaxed and happy when the news reporter is attacked, thus implying he is behind the attack or at least an accomplice in it; this would make the audience feel anxious and fear due to their nature of feeling remorse when someone is attacked and that in contrast this man is rejoicing in it.
When looking back on our footage I was happy with our continuity sequence towards the beginning as all the shots seemed to flow and link together well, thus making the characters movement though the house more realistic. An short clip of continuity in our sequence can be seen below.
This shot achieved all the goals we set out for it as it not only had good continuity, it also had the dim lighting we were striving for to help make the antagonist seem creepy and thus provide a gritty feel to the sequence.
However, an example of some bad shots in our sequence would be when the news anchor is listening to the news reporter speak. His reactions do not always link with the words or action of the news reporter, whilst there is a notably short time between their dialogue at one point; this in particular is very unlike an actual news report as there is usually a longer gap between speech.
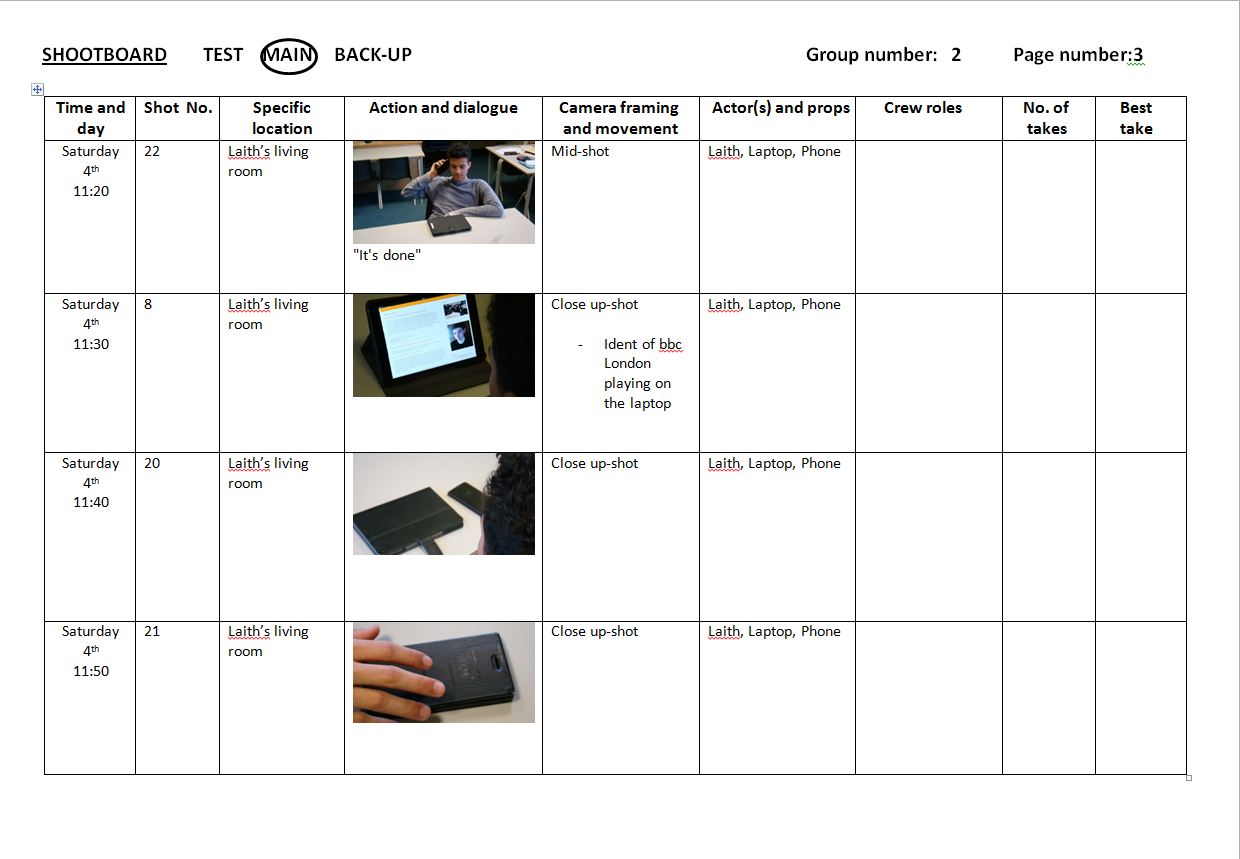 |
| This is a sample of our shoot board |
For our storyboard we had to add extra shots, such as reactions shots of the antagonist watching the news broadcast as this would make his purpose in the sequence more obvious to the audience and in turn make the resulting phone call make more sense. Some of these reaction shots included a shot of the antagonist becoming relaxed and happy when the news reporter is attacked, thus implying he is behind the attack or at least an accomplice in it; this would make the audience feel anxious and fear due to their nature of feeling remorse when someone is attacked and that in contrast this man is rejoicing in it.
When looking back on our footage I was happy with our continuity sequence towards the beginning as all the shots seemed to flow and link together well, thus making the characters movement though the house more realistic. An short clip of continuity in our sequence can be seen below.
This shot achieved all the goals we set out for it as it not only had good continuity, it also had the dim lighting we were striving for to help make the antagonist seem creepy and thus provide a gritty feel to the sequence.
However, an example of some bad shots in our sequence would be when the news anchor is listening to the news reporter speak. His reactions do not always link with the words or action of the news reporter, whilst there is a notably short time between their dialogue at one point; this in particular is very unlike an actual news report as there is usually a longer gap between speech.
R+P Post 17: Our editing arrangements
 |
| Our rough cut editing schedule |
The different roles we divided up within the group whilst we edited on our own included:
- someone choosing the best shots of the takes and then cutting them down to the right length to put in the sequence.
- someone gathering all the sound effects and the music track and then placing them on the sequence where required by the timeline.
- someone to add all the titles throughout the sequence and ensure they were all the same font type and size (to create continuity).
- someone to look through the entire sequence and fix any errors, such as continuity issues or technical faults.
After we edited on our own, we came together as a group to watch through the sequence and make reflections on what we thought we could improve on for the final shoot/edit - whilst also fixing any remaining errors or discussing individual preferences.
R+P Post 16: Casting, costumes, hair and make-up
In terms of make-up, we wanted our actors to look as natural as possible, especially the antagonist and news reporter. As our antagonist and news anchor were played by male characters we decided to apply no make-up to them, however, we did ask our female actor to use a normal days make-up as we needed her to seem relatable to other females watching but still fit in with our gritty style we tried to portray in the overall sequence.
Prior to shooting, all of our actor's were assigned a set costume to wear during shoots. We chose these costumes based on the role they were playing and in turn the level of sophistication they needed to give off, i.e the news anchor wears a smart shirt, whereas the antagonist wears a hoodie. The full list of costume items can be seen with the cast list below:
1) Jean Smith, played by Aisha Farah 2) Damien Brooks, played by Laith Lyster (me)
- Blazer - Dark hoodie
-Smart shirt - Tracksuit bottoms
-Smart trousers

3)Richard May, played by Hector Bloggs
- Blazer
-Smart collared shirt
-Lapel microphone
-Earphone wire

Prior to shooting, all of our actor's were assigned a set costume to wear during shoots. We chose these costumes based on the role they were playing and in turn the level of sophistication they needed to give off, i.e the news anchor wears a smart shirt, whereas the antagonist wears a hoodie. The full list of costume items can be seen with the cast list below:
1) Jean Smith, played by Aisha Farah 2) Damien Brooks, played by Laith Lyster (me)
- Blazer - Dark hoodie
-Smart shirt - Tracksuit bottoms
-Smart trousers


3)Richard May, played by Hector Bloggs
- Blazer
-Smart collared shirt
-Lapel microphone
-Earphone wire

R+P Post 15: Our filming location, set design and props
My house
Set Design- Within all the set-pieces used in my house we tried to use low-key lighting as we thought it would make our antagonist seem more mysterious and in turn spread anxiety throughout the audience.
Props- We used a phone and a Laptop as they were required to allow the story to flow and link. For example, the phone is required by the antagonist to make the call at the end of the film opening while the laptop is the platform on which the antagonist watches the news broadcast, thus without these props there would be no story to watch.
Props- We used a phone and a Laptop as they were required to allow the story to flow and link. For example, the phone is required by the antagonist to make the call at the end of the film opening while the laptop is the platform on which the antagonist watches the news broadcast, thus without these props there would be no story to watch.
 |
| A master shot of the room our antagonist enters |
The Classroom
Set Design- For this set we moved all the tables, bar 1, to the other side of the room from which we were shooting as we required an open space. We then placed 1 table and a teachers chair in front of a glass window to give the room the feel of a news room. Behind the window you can see people working in order to represent members of the actual BBC news station.
Props- We used a laptop and some notes to help signify that the character on screen was a realistic new anchor whilst also having a lapel microphone on his shirt and an earpiece with a wire to imply he is listening to the news reporter.
 |
| The table at which the news anchor will sit behind, within the classroom set |
The Forest
Set Design- We did not make any set changes to this location as we wanted to make it seem as natural as possible.
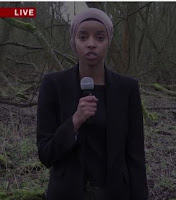
Props- We used a microphone as this is conventional of an actual news report, in turn it made our opening sequence seem more realistic and therefore familiar to the audience. Moreover, the microphone also helped add to the thrill at the end of the opening when the reporter goes missing; the prop can be seen lying on the floor and thus implies that she was taken against her will as she may have dropped it.
 |
| The forest in which the news reporter introduces the story |
R+P Post 14: Our filming arrangements
 |
| Our shoot arrangement form for the school shoot |
Full arrangements:
- We agreed to meet at 9:00 and end shooting at 16:00 on the weekend shoot.
- We also agreed to meet at 12:30 and end shooting at 13:30 on the Monday shoot in school.
- The locations for filming were the Enfield Island Village Forest, my house and a classroom in our school
Actors:
We only had two actors, Kodie and Hector. |
| Our shoot arrangement form for the home shoot |
shots done first so we would not have to waste her time.
2) Hector- We gave Hector a call time of 12:30 on the Monday after the shoot weekend as he was required for a school shoot.
R+P Post 13: Our Animatic
Another method of planning we decided to use was an
animatic. We believed this would help bring our storyboard to life and in turn
give us the opportunity to make any final revisions before our test shoot. An
animatic is a preliminary version of a film, produced by shooting successive
sections of a storyboard and adding a soundtrack. Our animatic can be seen
below:
Our animatic was very beneficial to our group as it made us
realise that our script needed tweaking as there are some rather large pauses
with no dialogue, due the imbalance of the script. Examples of this can be seen
within the segment of "0:27-0:56". Because of this, me and Aisha revised
the script.
R+P Post 12: Our Storyboard
To further help with the planning of our film opening we produced a storyboard. This was extremely useful as it allowed us to visualize our film opening on paper and in turn give us a better idea of how it might look on camera, moreover this gave us the opportunity to evaluate shots and make changes where necessary.
Much like our timeline, we split our storyboard into three parts: beginning, middle and end.
As you can see in the picture, we labeled our different shot types with colored post-stick notes. The key we use was:
Much like our timeline, we split our storyboard into three parts: beginning, middle and end.
 |
| Our Storyboard |
- Close Ups = blue
- Mid Shots = orange
- Long Shots = green
- Graphics = pink
In order to illustrate camera and character movement we made use of arrows, with thick black arrows representing camera movement and thin black arrows representing character movement.
Furthermore, the storyboard was also very useful in creating our shoot boards as it showed us all of the settings we were using and in turn allowed us to group our shots in terms of set pieces.
R+P Post 11: Our Timeline
To help with the planning of our film opening we created a timeline. We believed this would not only be useful for the final edit, but also for the editing of the animation, the storyboard and in turn the shoot board. A major advantage of the timeline was that it allowed us to keep strictly within the 2 minute time restrictions and still have enough content to fulfill the brief and produce a great film opening. For our storyboard in particular, the timeline was useful for structure as it allowed us more freedom to visualize our film opening with pictures with knowledge we had all timings on our timeline.
Our timeline consisted of three sections: a beginning, middle and an end. By splitting the timeline into sections we were better equipped to focus on all aspects of the timeline. Furthermore, the different layers: video track, visual effects/titles and soundtrack/music allowed us to better plan how our dialogue and music would mix well together and also how/when our titles would appear.
 |
| Our timeline |
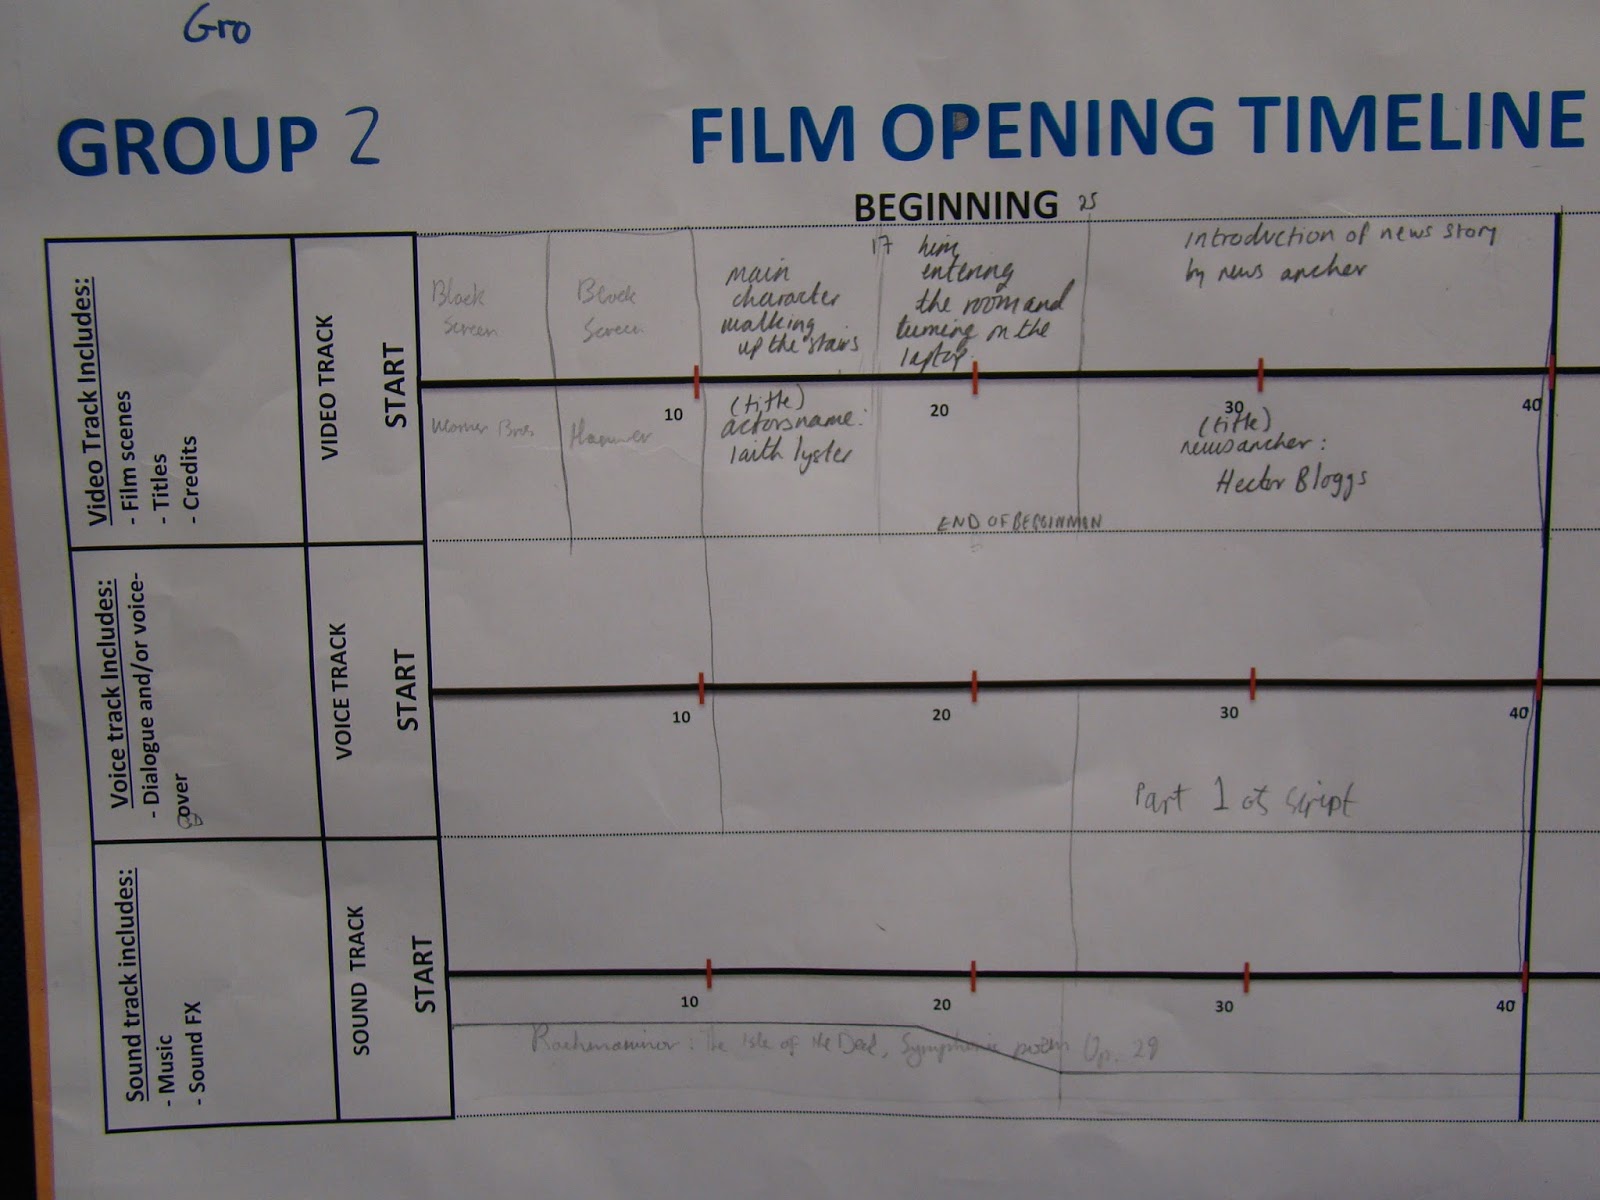 |
| The beginning of our timeline |
 |
| The middle of our timeline |
 |
| The end of our timeline |
Subscribe to:
Posts (Atom)